


Well every single one of us have faced a situation in which we start our computer and the Windows OS wont simply boot. Damn it!
If someone was doing such a hard job and failed to back up everything then this situation would create a nightmare for him
Well repairing the the OS with your Windows 7 installation DVD would get you back on track. But unfortunately most of us wont have this DVD as most of us get Windows 7 installed in our PC when we get it..
Well. in this tutorial we will show you how to create a Windows 7 repair disc which will help to start an unbootable computer in no time. Its actually worth so don't reject this tutorial this can save a lot of your hard works.
Creating A Repair Disc:
1. Go to Control Panel:
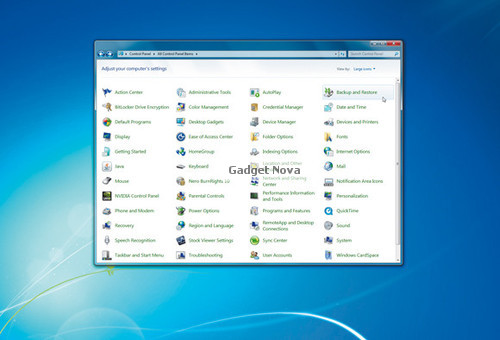
Click "Start" or just tap the "Windows key" and click on "Control Panel" . Then a Window will open if the "View by:" option is set as "Category" then change it to "Large Icons" which thereby making us see all the control panel icons in one window. Find the "Back Up and Restore" icon and double click on that icon. Then a new window will appear. This is where we create our repair disc.
2. Creating a System Repair Disc

Then click on "Create a system repair disc" somewhere on the top left of that window to create the repair disc
3. Locate the blank disc

Insert a CD or DVD it doesn't matter whether its a CD or DVD but we recommend to use a DVD just in case if the repair disc takes more space than a CD can take. Locate the blank disc by clicking the arrow to the right of the currently selected drive and then choose the drive which has the blank disc inserted
4. Click and Burn

Click "Create disc" button and the burn process will start automatically and will write the system recovery to the CD or DVD. This method wont take much time.
5. Testing the disc(be careful)

After this you have to immediately check whether that disc works. So for this close all the open windows and reboot your system. Change your BIOS first boot device priority to load from your disc drive. If its already set then just restart the system
6. Boot the disc

If your computer boots from the recovery disc correctly you will see a message prompting you to "press any key to boot from CD or DVD". So just tap any key which you desire and the repair disc will continue to load then choose the option "Windows Setup [EMS Enabled]" from the menu.
7. System Recovery Options

Select your keyboard and click "Next". Select your Windows installation then "Next" again which will lead you to the recovery option. Click "Startup Repair" and that will help your computer to boot again.
Through these very simple steps you have made yourself prepared to save your computer from such situations. Hope this tutorial helped.
If someone was doing such a hard job and failed to back up everything then this situation would create a nightmare for him
Well repairing the the OS with your Windows 7 installation DVD would get you back on track. But unfortunately most of us wont have this DVD as most of us get Windows 7 installed in our PC when we get it..
Well. in this tutorial we will show you how to create a Windows 7 repair disc which will help to start an unbootable computer in no time. Its actually worth so don't reject this tutorial this can save a lot of your hard works.
Creating A Repair Disc:
1. Go to Control Panel:
Click "Start" or just tap the "Windows key" and click on "Control Panel" . Then a Window will open if the "View by:" option is set as "Category" then change it to "Large Icons" which thereby making us see all the control panel icons in one window. Find the "Back Up and Restore" icon and double click on that icon. Then a new window will appear. This is where we create our repair disc.
2. Creating a System Repair Disc
Then click on "Create a system repair disc" somewhere on the top left of that window to create the repair disc
3. Locate the blank disc
Insert a CD or DVD it doesn't matter whether its a CD or DVD but we recommend to use a DVD just in case if the repair disc takes more space than a CD can take. Locate the blank disc by clicking the arrow to the right of the currently selected drive and then choose the drive which has the blank disc inserted
4. Click and Burn
Click "Create disc" button and the burn process will start automatically and will write the system recovery to the CD or DVD. This method wont take much time.
5. Testing the disc(be careful)
After this you have to immediately check whether that disc works. So for this close all the open windows and reboot your system. Change your BIOS first boot device priority to load from your disc drive. If its already set then just restart the system
6. Boot the disc
If your computer boots from the recovery disc correctly you will see a message prompting you to "press any key to boot from CD or DVD". So just tap any key which you desire and the repair disc will continue to load then choose the option "Windows Setup [EMS Enabled]" from the menu.
7. System Recovery Options
Select your keyboard and click "Next". Select your Windows installation then "Next" again which will lead you to the recovery option. Click "Startup Repair" and that will help your computer to boot again.
Through these very simple steps you have made yourself prepared to save your computer from such situations. Hope this tutorial helped.


0 comments:
Post a Comment